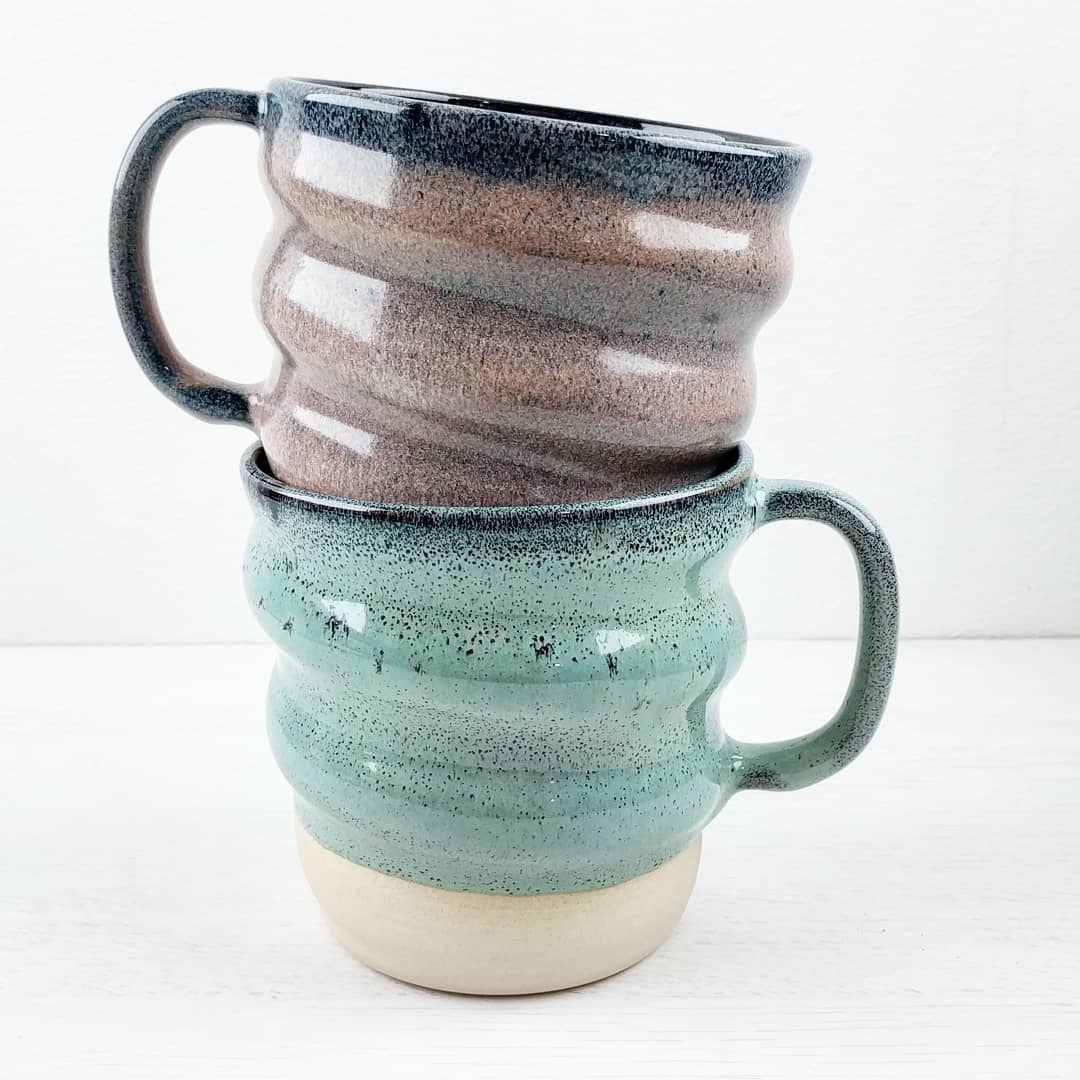

Drippy Slippy Mugs
The Drippy Slippy pieces came about from a desire to replicate the glorious drippiness of some glazes, but in the clay itself. The advantage to using slip instead of glaze is the degree of control you have, the shape you make in the slip application is (other than a little shrinkage as it dries) the shape it will stay throughout the firing.

To do this, you need a thick mix of slip (ideally the same clay as you throw in, or a slip with a similar shrinkage to the clay) and something to apply it. I use one of the cheap plastic syringes you can find on Amazon as I find they are better at sucking up the slip than some of the dedicated slip bulb applicators, but you can use whatever equipment or method you want.
The main consideration for this technique is relative dryness of the piece and slip. You need to leave the piece long enough that it's firmed up enough to withstand the process, but not so long that it's too dry. The problem with excessive dryness is that the clay has already begun to shrink but the slip hasn't, and once the slip starts to shrink around the pre-shrunk clay it will crack and potentially fall off completely. This means it becomes quite obvious whether you got it right, so after a few attempts you'll start to get a feel for the correct starting conditions.
So with that in mind, here's the process:
Throw a piece, and leave it on the batt to dry to soft leather hardness. For me, this normally means throwing them in the morning and applying the slip in the afternoon, but for larger pieces I'll dry them slower in sealed plastic boxes and the slip might be applied a day or two later.

If it's a mug, you then have a choice between adding the handle before the slip or after. For my Drippy Slippy mug I add the handle first as it gives a focal point for the slip to flow around in a more interesting way, but for the Drippy Slippy Christmas Tree Mugs I added the handle after to preserve the tree pattern. This is more of a design consideration than a technical one.
If you do add the handles first, I would suggest leaving space above and below the handle to make the slip application and trimming easier.

The application can be done however you want. I generally add the slip to the top, then lightly tap the batt on the wheel head to get it to move. I think several layers of slip looks more interesting as they interact with each other. It's important to add less on the later layers as they can flow more readily over the previous layers, and you risk covering them all with the final layer otherwise.
All I do to marble the slip is suck several colours of slip into the same syringe and let that mix them together.
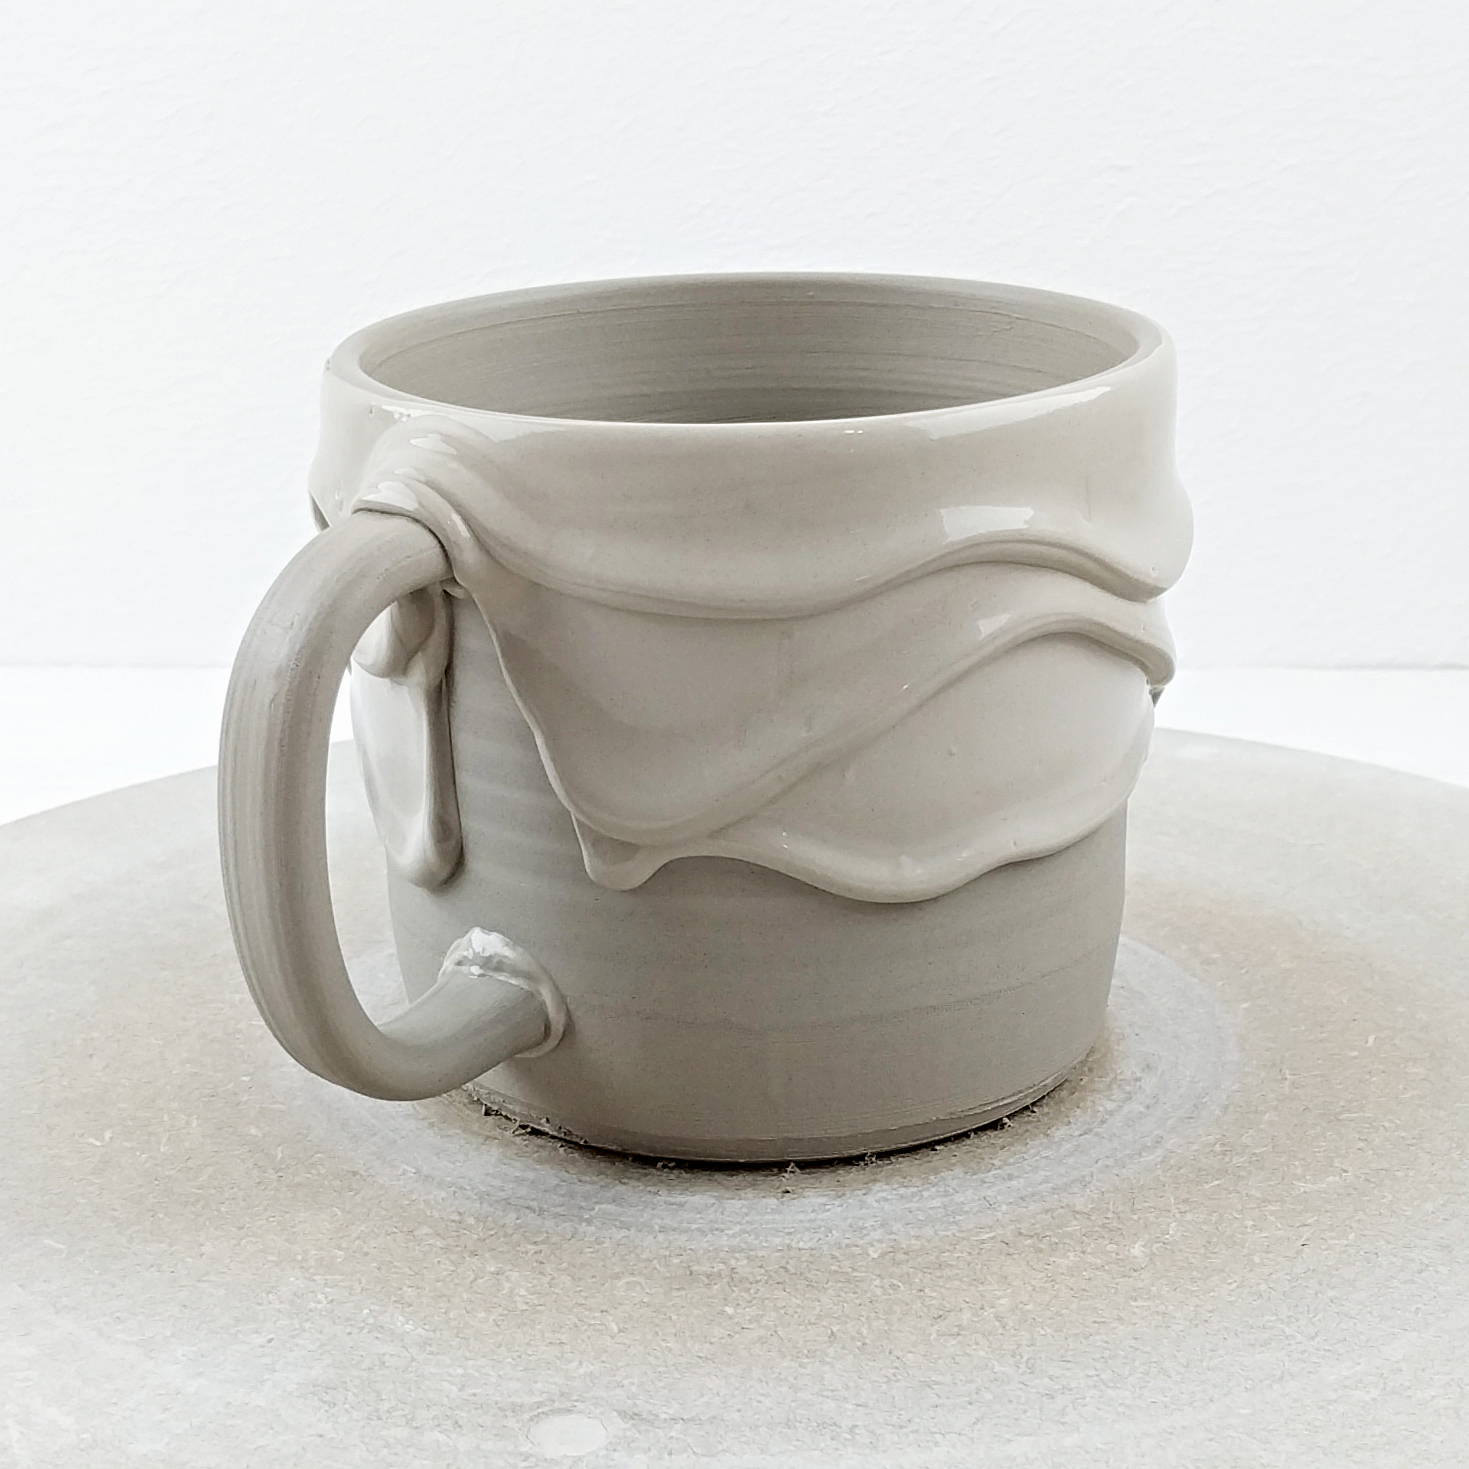
The pieces then need to be dried slowly over at least a few days, if not longer. The slip adds to the overall thickness of the piece so it's important to account for that. Once it's firm enough to remove from the batt it can have the foot trimmed, being careful not to damage the slip pattern.
Once it's dry the slip is part of the clay itself, so no other considerations need to to be made. It can be fired and glazed like any other piece.

That's all there is to it! Please try it and let me know how you get on, message me or use the hashtag oldforgecreations (I often miss @mentions on Instagram and there's no way to find them afterwards, but I'll see the tag). Good luck!


